Tableau Web Data Connector
Product End of Life
Tableau Web Data Connector reaches end of life on June 1, 2023
As of June 1, 2023, this product will no longer be maintained; this includes new features, bug fixes, security updates, and both Niagara 4 and Tableau compatibility updates. Due to the upcoming end of life date, the product will no longer be available for purchase after January 1, 2023.
Frequently Asked Questions
Visualize Your Station Data With Tableau
Many organizations have invested significant amounts of time and resources into using Tableau to visualize a variety of enterprise data. Until now, the answer to the question “Can we pull BAS data in to Tableau?” has often been “No,” or if “Yes” it involves contracting an expensive third-party developer to create a middleware solution that typically includes exporting data to a separate service and using Tableau to access that dataset.
With the Tableau Web Data Connector you can provide access to your data in an efficient and familiar manner. Just drop a TableauExt component on your pre-existing history and your data will be open for business.
What's New in 1.0.2
Content security policy settings and file locations have been updated to work with Niagara 4.10+ CSP settings.
Niagara Setup
Before following along, make sure that you download, install, and (optionally) license Tableau Web Data Connector.
- Open the Tableau Web Data Connector palette (nmodstableau) in Workbench and connect to your station.
- If you have installed the Tableau WDC to your station, it is active and ready to serve requests.
Users connecting with Tableau will be prompted for a username and password before they can access your history data. These credentials are specific to the Tableau WDC and independent of your station/platform setup. By default they are set to:
Username:
tableau
Password:nmods123It is strongly recommended to change the default credentials to secure your data.
-
To change the default login credentials, drag the
TableauAuthorizationcomponent from the palette on to yourConfig > Servicesfolder in your station. This will tell the Tableau WDC to use a custom username and password for authorization. -
Double-click the
TableauAuthorizationcomponent in your station to open its Property Sheet. Set your desired username and password, then save. By default, none of your existing Niagara histories will be available in Tableau right away. You must explicitly allow access to a history by dragging the
TableauExtto the point whose history you want to make available. TheTableauExtshould be right next to the history extension on the point. Only points with a history extension and aTableauExtwill be visible to Tableau users.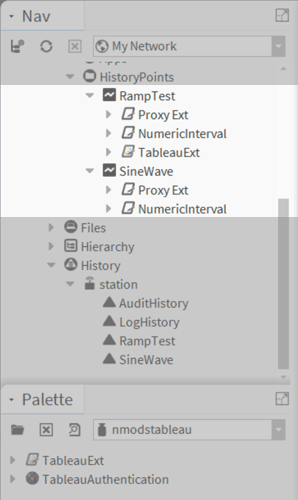
In the example above, the
RampTestpoint has a NumericInterval history extension and aTableauExt. Its entire history will be available to users who connect to the Tableau Web Data Connector with Tableau. TheSineWavealso has a NumericInterval history extension but does not include aTableauExtand therefore will not show up as a data source in Tableau.
User Authorization
History/Point Setup
Providing Access to Tableau Users
After you've setup your histories for access, you can provide Tableau users with a web data connector URL. The web data connector URL is https://[your_stations_host]/nmodstableau.
Replace [your_stations_host] with your station's domain name, host name, or IP address. It should be the same thing you use to access the station via a web browser.
If your station is not using SSL, be sure to change https to http.
For example, if your station was accessed via the local IP address 192.168.1.100,
the Tableau web data connector URL would be https://192.168.1.100/nmodstableau.
Tips
- Don't forget to include the username and password that you setup in step #5 with the web data connector URL when providing it to Tableau users.
- Remember that the same networking rules that apply to your station's URL apply to the web data connector URL. If you are using a local IP address, or one that requires a VPN, the Tableau user will need to be on the same network or connected via a VPN to access the data in Tableau.
- If you want to test the connection and data in Tableau yourself, you can download a free trial from tableau.com. After you've installed Tableau, follow the instructions in the Connecting with Tableau section.
HTTPS/SSL Notes
If you are using a self-signed Tridium certificate, Tableau may reject it because it is untrusted. To prevent this and continue to use HTTP/SSL you may have install a trusted certificate. These can be purchased online or created for free at Let's Encrypt. If you do not wish to do this, you can enable "HTTP" in the station's WebService component and make sure to instruct your Tableau users to use "http" in their web data connector URL instead of "https".
Connecting with Tableau
-
Open Tableau. On the Connect page, under "To a Server", click the "More..." link. Choose "Web Data Connector" from the list.

-
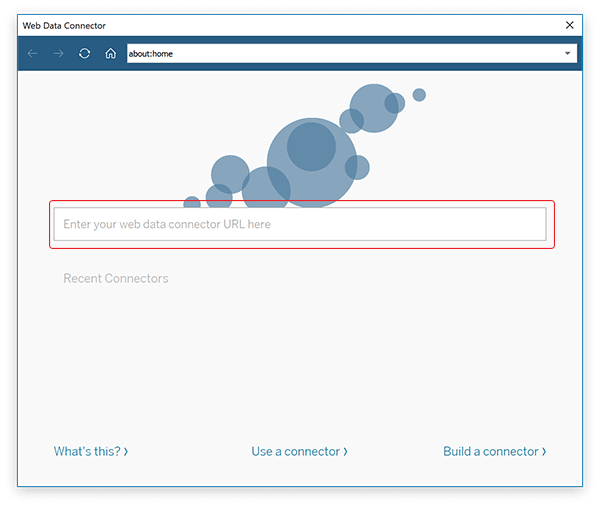
Enter the Web Data Connector URL in the text box, hit enter.
-
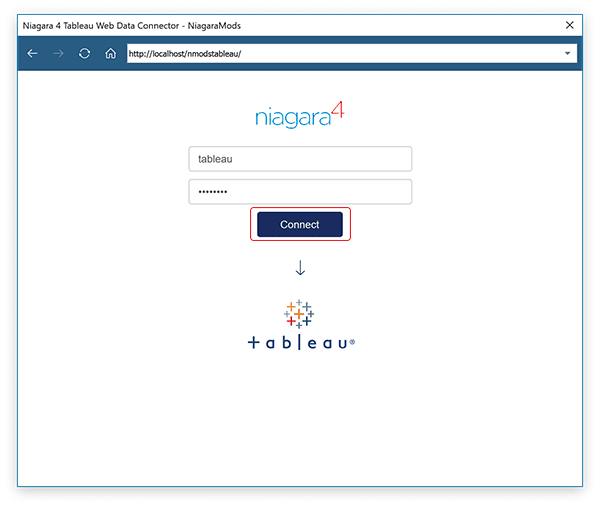
Enter your username and password and click the "Connect" button. Tableau will now begin connecting with Niagara.
-
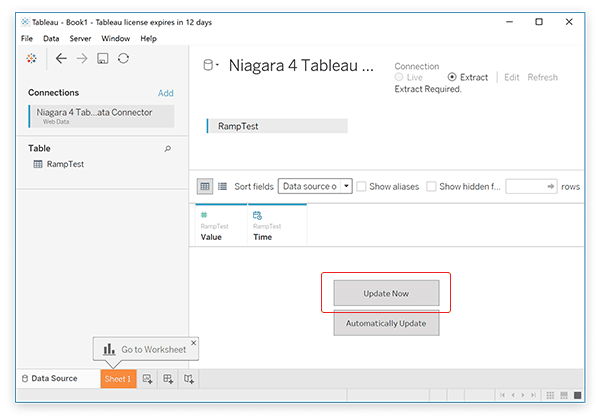
When the querying process is complete, a connections window will appear with your tables on the left. Click on a table
and select the "Update Now" button on the right.
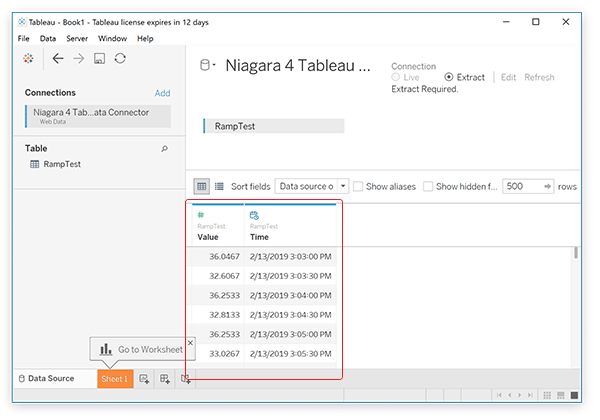
-
You should see your Niagara data come in to Tableau.
Have a question? Find a bug?
You can connect with us via the chat bubble below or feel free to send us a detailed description of your problem and we’ll get back to you.